![]()
The fastest way to boostrap your React & Next.js apps!
You can view this documentation on our website too! Check it out here.
Features
- Bulma
- Next.js
- React Hooks Form
- Firebase Authentication
- Firestore Database
- Formspree Integration
- Google Analytics Integration
- ESLint + Prettier Configuration
Project Structure
The application is neatly structured into folders representing their individual responsibility.
componentsdirectory contains all the frontend React components used to render the appconfigdirectory contains all the configuration you will be doing to change the various configs (e.g. email or text copies) that components pull the information from. It also containsUserContextwhich takes care of the authentication mechanism in the app.layoutsdirectory define layouts for the rendering of the pages. It helps to abstract repetitive layout structure code into a component of itself.libdirectory contains assisting services that help to connect to both Firebase Authentication and Firestore.pagescontains all the pages that will be rendered by the app. This is where our components are pieced together._app.jsis the root of the app where it is initialised.publicdirectory is where the images and static assets of the site belong to.stylesdirectory just contains one file -globals.scsswhich has global styles for the entire app..envis the file to put in your environment variables (secrets that will not be shared with anyone else)
Getting Started
All the primary configurations can be done under the config folder which contains all the various information the app uses to run (e.g. emails or text to show).
Firebase Configurations
Setup a Firebase project at Firebase Console
Setup a Firebase project at Firebase Console
Create new project by clicking Add Project button
Goto Project settings by clicking the Gear Icon (), next to the Project overview
Under General tab, goto
Your appssection, click Add app buttonPlease click the web button (
 ) on the
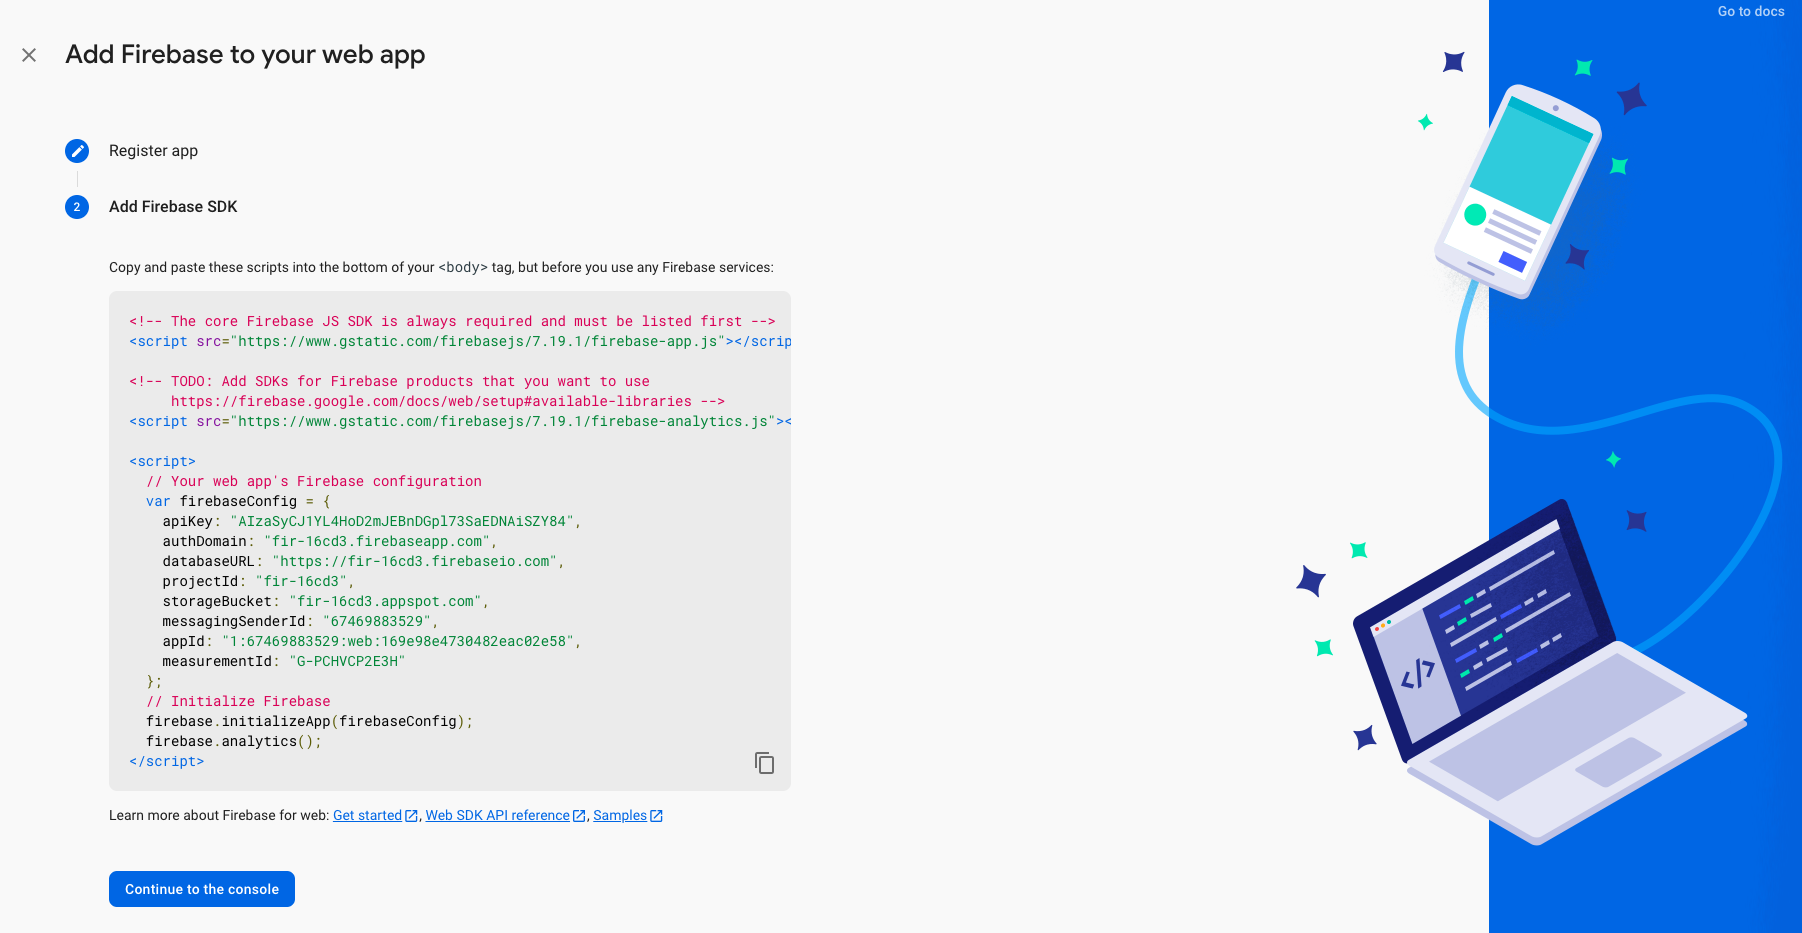
 Add Firebase to your appdialogue windowRegister your app by giving app nickname and click Register app button
Finally, copy and save the Firebase SDK configuration into your project .env file e.g:
Note: Do note that when you sign up, the password needs to be at least 6 characters when you sign up and email sign ups must be unique.
Formspree Configurations
- Register for an account at Formspree.
- Copy the email you registered with in Step 1.
- Under
config/global.js, update theemailkey undercontactFormSubmissionsto be the email the contact form submissions will be sent to.
Google Analytics
- Create a new projects on the Google Analyics console. Check this link for more information: https://support.google.com/analytics/answer/1008080?hl=en.
- Get the tracking code.
- Navigate to
/config/globals.jsand paste your tracking code under the keygoogleAnalyticsTrackingId.
Your Google Tracking ID will automatically be added to every page.
Formatting and Linting
Supercharge comes out of the box with ESLint and Prettier configured. If you prefer to have your own customisation, you can edit .eslintrc.json and .prettierrc.json to edit the respective configurations.
Running the Application
npm installnpm run dev# oryarnyarn devThis will open up the app running on port 3000. Visit http://localhost:3000 to see it in action!
To build locally and see your production version:
xxxxxxxxxxnpm run buildnpm run start# oryarn buildyarn startConfiguring Content
It is extremely easy to configure the various content you see on the pages. Navigate to /config folder to view all the various configurations for the components.
Components are made in a dynamic way. For example, if you need to add multiple FAQ items, simply go to /config/faq.js and add your FAQs in a list of question and answer JSON object format. The FAQ component will dynamically fetching these content and render them.
The same applies for all other components such as testimonials or features. You can edit the JSON structure present in /config. The components have been built in a dynamic way such that it adapts and renders based on the JSON. You need not worry about styling or positioning.
Remember that global configs such as your brand name, social media contacts etc. can be placed under /config/global.js.
Building and Deploying
We will be using Vercel for deployment simply because the platform itself was created for use with Next.js and provides an excellent and developer-friendly experience of hosting your site for free!
- Push your project to Github
- Go to Vercel
- Click on "Import Project"
- Click on "Import Git Repository"
- Follow the guided steps to build and deploy your site
- Remember to add all your
.envsecrets during configuration
Contact
If you need help with any of the configurations or have some feedback for us, reach out to us at supercharge.dev@gmail.com.